Wednesday, June 29, 2011

Mrs. DeLorbe

Hi, Calvert and 6D!


There is a new comer to the 6th Age wing next year and it happens to be my good friend (and a great teacher!) Mrs. DeLorbe! She will be teaching 6E in the fall, which means we will share a wall. You may remember that Mrs. DeLorbe and I have been co-counselors together for the past two summers at a Calvert camp of our own creation: Darling Dolls.


Mrs. DeLorbe has an excellent blog and is so excited for the fall with her new students. I asked her to guest post on my blog...so- without further adew...here is Mrs. DeLorbe!


xoxo,


Mrs. Armstrong


P.S. Don't forget to check out Mrs. DeLorbe's blog here!


A big thanks to Mrs. Armstrong for letting me be a guest blogger! My name is Mrs. DeLorbe. I will be starting my sixth year teaching at Calvert School in the fall. Some of you know I will be moving to a new classroom, 6-E. Mrs. Armstrong and I are very excited to be neighbors!


I wanted to share with you a fun project that you can do together with your family over the summer.


Each summer, my family travels to Deep Creek Lake. Last summer, we had an idea to make tie-dyed t-shirts using souvenir shirts from our favorite place to go in Deep Creek… The Lakeside Creamery.


We had so much fun working on the shirts together and seeing how everyone’s shirt turned out in the end. Each one was different, just like the people in our family.


Here is how you can make your own tie-dyed shirts.


First, we purchased a tie-dye kit from Michael’s craft store. They cost between $20- $30, depending on how many shirts you want to make. Make sure you sign up for their emails to get a coupon for 40% off one item.


Along with the kit you will need:


· t-shirts


· gallon zip lock bags


· a space to work and hang your shirts to dry


There are many different techniques you can use to fold your shirts.Your kit will come with instructions for the basic designs. Remember, there is no “wrong way” to fold a shirt. My favorite part of tie-dying is never knowing what the shirts will look like in the end. Don’t be afraid to try something different. For this part of the project, there are no rules!

I normally chose to make the “spiral design,” but decided to try something different… “mirror image.”


To make a “mirror image” design, follow these simple steps.


1. Fold the shirt in half, lengthwise


2. Starting at the shoulder, fan fold the shirt, making 1” pleats


3. Continue working your way down the shirt


4. Begin adding rubber bands to hold the pleats in place


5. Continue adding rubber bands until you have worked your way down the entire shirt


Now it is time to prepare the dye. For the best results, don’t add water to the dyes until you are ready to use them. Read all the directions on the package before you begin. I have found that working with a wet shirt works much better than a dry shirt.


When you finish adding dye to your shirt, place it in a zip lock bag and close it up. Leave your shirt in the bag for at least 12 hours, preferably 24 hours.


Next, use warm water to rinse your shirt. Once the water starts to turn clear remove the rubber bands and continue rinsing. Finally, hang your shirt to dry.


Wash your shirt a few times alone in the washer, using the hottest water setting.


Have a great summer!


Articles of Interest

Check out a new hyperlink I recently added on the sidebar of my blog under "Articles of Interest". I have been holding onto the February 2011 issue of People Magazine because of an article they printed about a Forest Kindergarten program at Cedarsong Nature School in Washington state. Although short, the paragraph and photos utilized to describe the school are very similar to the experience I had in Zurich, Switzerland this past March.


I additionally hope to add to this listing of articles in the months to come.

Enjoy!

Tuesday, June 28, 2011

Parlez-vous francais?

In preparation for my August trip to France, I enlisted the tutoring of Calvert's very own Madame Cooke!
Having studied both Spanish and Italian in school, I wanted to learn the basics of French before departing. My two friends, Katie and Molly, and I have been gathering at Madame Cooke's house two times per week over the past month for a few hours to learn the following:
-formal and informal greetings
-the alphabet
-French numbers
-how to ask a shopkeeper for the price of an item
-how to tell time
-directions; where something is located
-food and drink names in French; how to order in a restaurant
-places of interest in Paris: museums, cathedrals, etc.
-how to use the Paris metro
-and much more!

Madame Cooke has been quite encouraging as I have learned how to pronounce and speak french authentically. I am now even more excited for my trip abroad! Thursday afternoon is our final french session, where no english-speaking will be allowed. Wish me luck!

Time Flies

Summer "officially" began for me this Monday as both camp sessions ended. You know what this means? No more watch-wearing! At the start of summer I always retire my watch until August.

Do you have a rite-of-summer passage, 6D?

Puppets, Corn Husk Dolls, and a Tea Party

The campers made puppets last week:


Some even decorated both the front and the back with different faces.


Upon completion of the puppets, the girls learned how to make corn husk dolls. Corn husks and various yarn was used. This project involved a lot of yarn tying!


We wrapped up the second session by singing happy birthday to a fellow camper,

and celebrated with a tea party!


American Girl dolls were a favorite at the tea party!

Mrs. DeLorbe and I enjoyed these past two weeks, and have already starting planning next summer...complete with real tea cups!
Have a great summer, girls!

Wednesday, June 22, 2011

Darling Dolls, Session 2


Session 2 of Darling Dolls Camp began on Monday morning with the girls crafting paper dolls. They added wonderful detail to these dolls and created a fabulous wardrobe and accessories!


What a great outfit!


This paper doll wouldn't be complete without a bathingsuit and flippers!


In addition to fairy flower dolls created yesterday, they also began their story boards.

I look forward to making puppets this morning and can't wait to be inspired by their creativity!

Sunday, June 19, 2011

The Power of Play

A fellow teacher sent me this interesting article on the power of play- check it out!

I like the idea that play is considered "the work of a child", and I appreciated how the different elements of playtime were itemized and clarified in detail.

Saturday, June 18, 2011

Highlights of Summer- So Far...

With the end of another school year comes much needed time to relax and regroup before school begins again in the fall. A few highlights of my summer (thus far) have included:


-Receiving a very special (and unexpected) Calvert award at Eighth Grade Graduation (Thank you to the Apgar Family and Dr. Martire.) My dad and husband were able to attend this special occasion with me.


-Hanging out with good friends!


-Spending time with Man's Best Friend....or in this case- Tyson, my dog! Isn't he cute?


What are you up to this summer, 6D? Have you celebrated the end of school in a special way?

Keep me posted about your summer adventures!
xoxo, Mrs. Armstrong

Darling Dolls Tea Party

Yesterday we celebrated the end of camp with a tea party under the gazebo. The girls dressed in their fanciest frocks and brought their favorite dolls to share in this special occasion. We celebrated a camper's fifth birthday as well- what a special treat! The girls sang happy birthday before feasting on small sandwiches, watermelon, cupcakes, and iced tea, of course! Baby bottles filled with candy were gifts- a token of our appreciation for a wonderful week spent together!


Mrs. Delorbe and I enjoyed this week and are looking forward to the second session of camp on Monday!

Thursday, June 16, 2011

Nesting Dolls


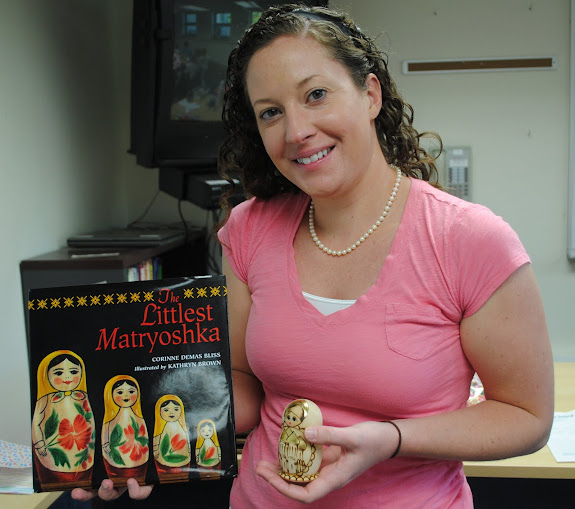
Yesterday Mrs. DeLorbe and I read a story about Russian nesting dolls in preparation for our busy day at camp. The girls paid close attention to the tiny details on the dolls, and especially loved the doll's large eyes with long eyelashes!


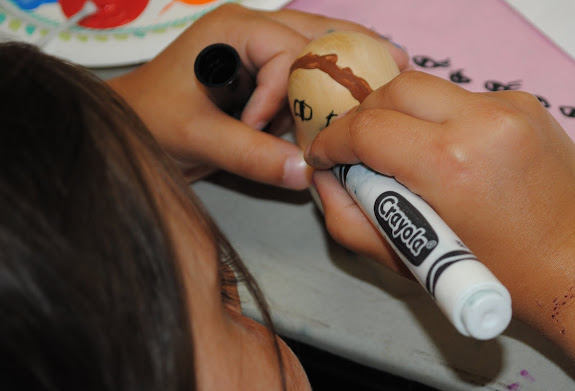
The girls quickly got to work, using their family photos as inspiration. Cotton swabs and thin-tipped markers were utilized in their designs.


The completed, dry dolls were on display today!


This girl is part of a family of 6, so she incorporated her dad on one side of the largest doll...
...and her mom on the other side!


Take a closer look.


The girl-

-and her dolls.


This girl painted herself as the second largest doll in the family. Great idea!


Love the colors!


The day ended with sidewalk chalk fun by the gazebo!

Did you notice the above hopscotch board? Can you figure out why it is so small? Why, it's doll-sized, of course!


It's time to get ready for the tea party! See you soon!